Pin-Points: Testing Pinterest Projects and Sharing the Results
By Kellie Doligale
Every day when it’s time for my daughter to nap, I cuddle up with her until her blue eyes close and browse a little Web site called Pinterest. Gaining popularity at a speed comparable to Facebook, Pinterest is an online “pin board” to display all things creative, clever and appealing.
Pinterest is packed with great ideas for moms with children of every age. From baby-friendly crafts to simple nursery color schemes, Pinterest is the answer to a free afternoon.
Electing to start this series with something simple but messy, I found pins for a sweet artwork concept and homemade finger paint.
We start with the homemade finger paint. Instead of buying overpriced tubes of chemicals, you can use a few household ingredients to make a baby-friendly rainbow.
Finger Paint Recipe:

Combine 3 tablespoons sugar, ½ teaspoon salt, ½ cup corn starch and 2 cups water in a small saucepan on medium heat.
The recipe says nothing about how frequently the mixture needed to be stirred, only that it would thicken. Refusing to leave the stove for fear of returning to a milky white cement, I watched the pot closely and stirred frequently.

Lumps of a glue-like substance will take shape. Remove the saucepan from the heat and keep stirring. Everything will blend together to a pudding consistency. Separate into containers and add food coloring to create your desired colors. Shades of green and yellow require a lot of dye to show up on paper. We opted for teal and orange.

Word Canvas Directions:
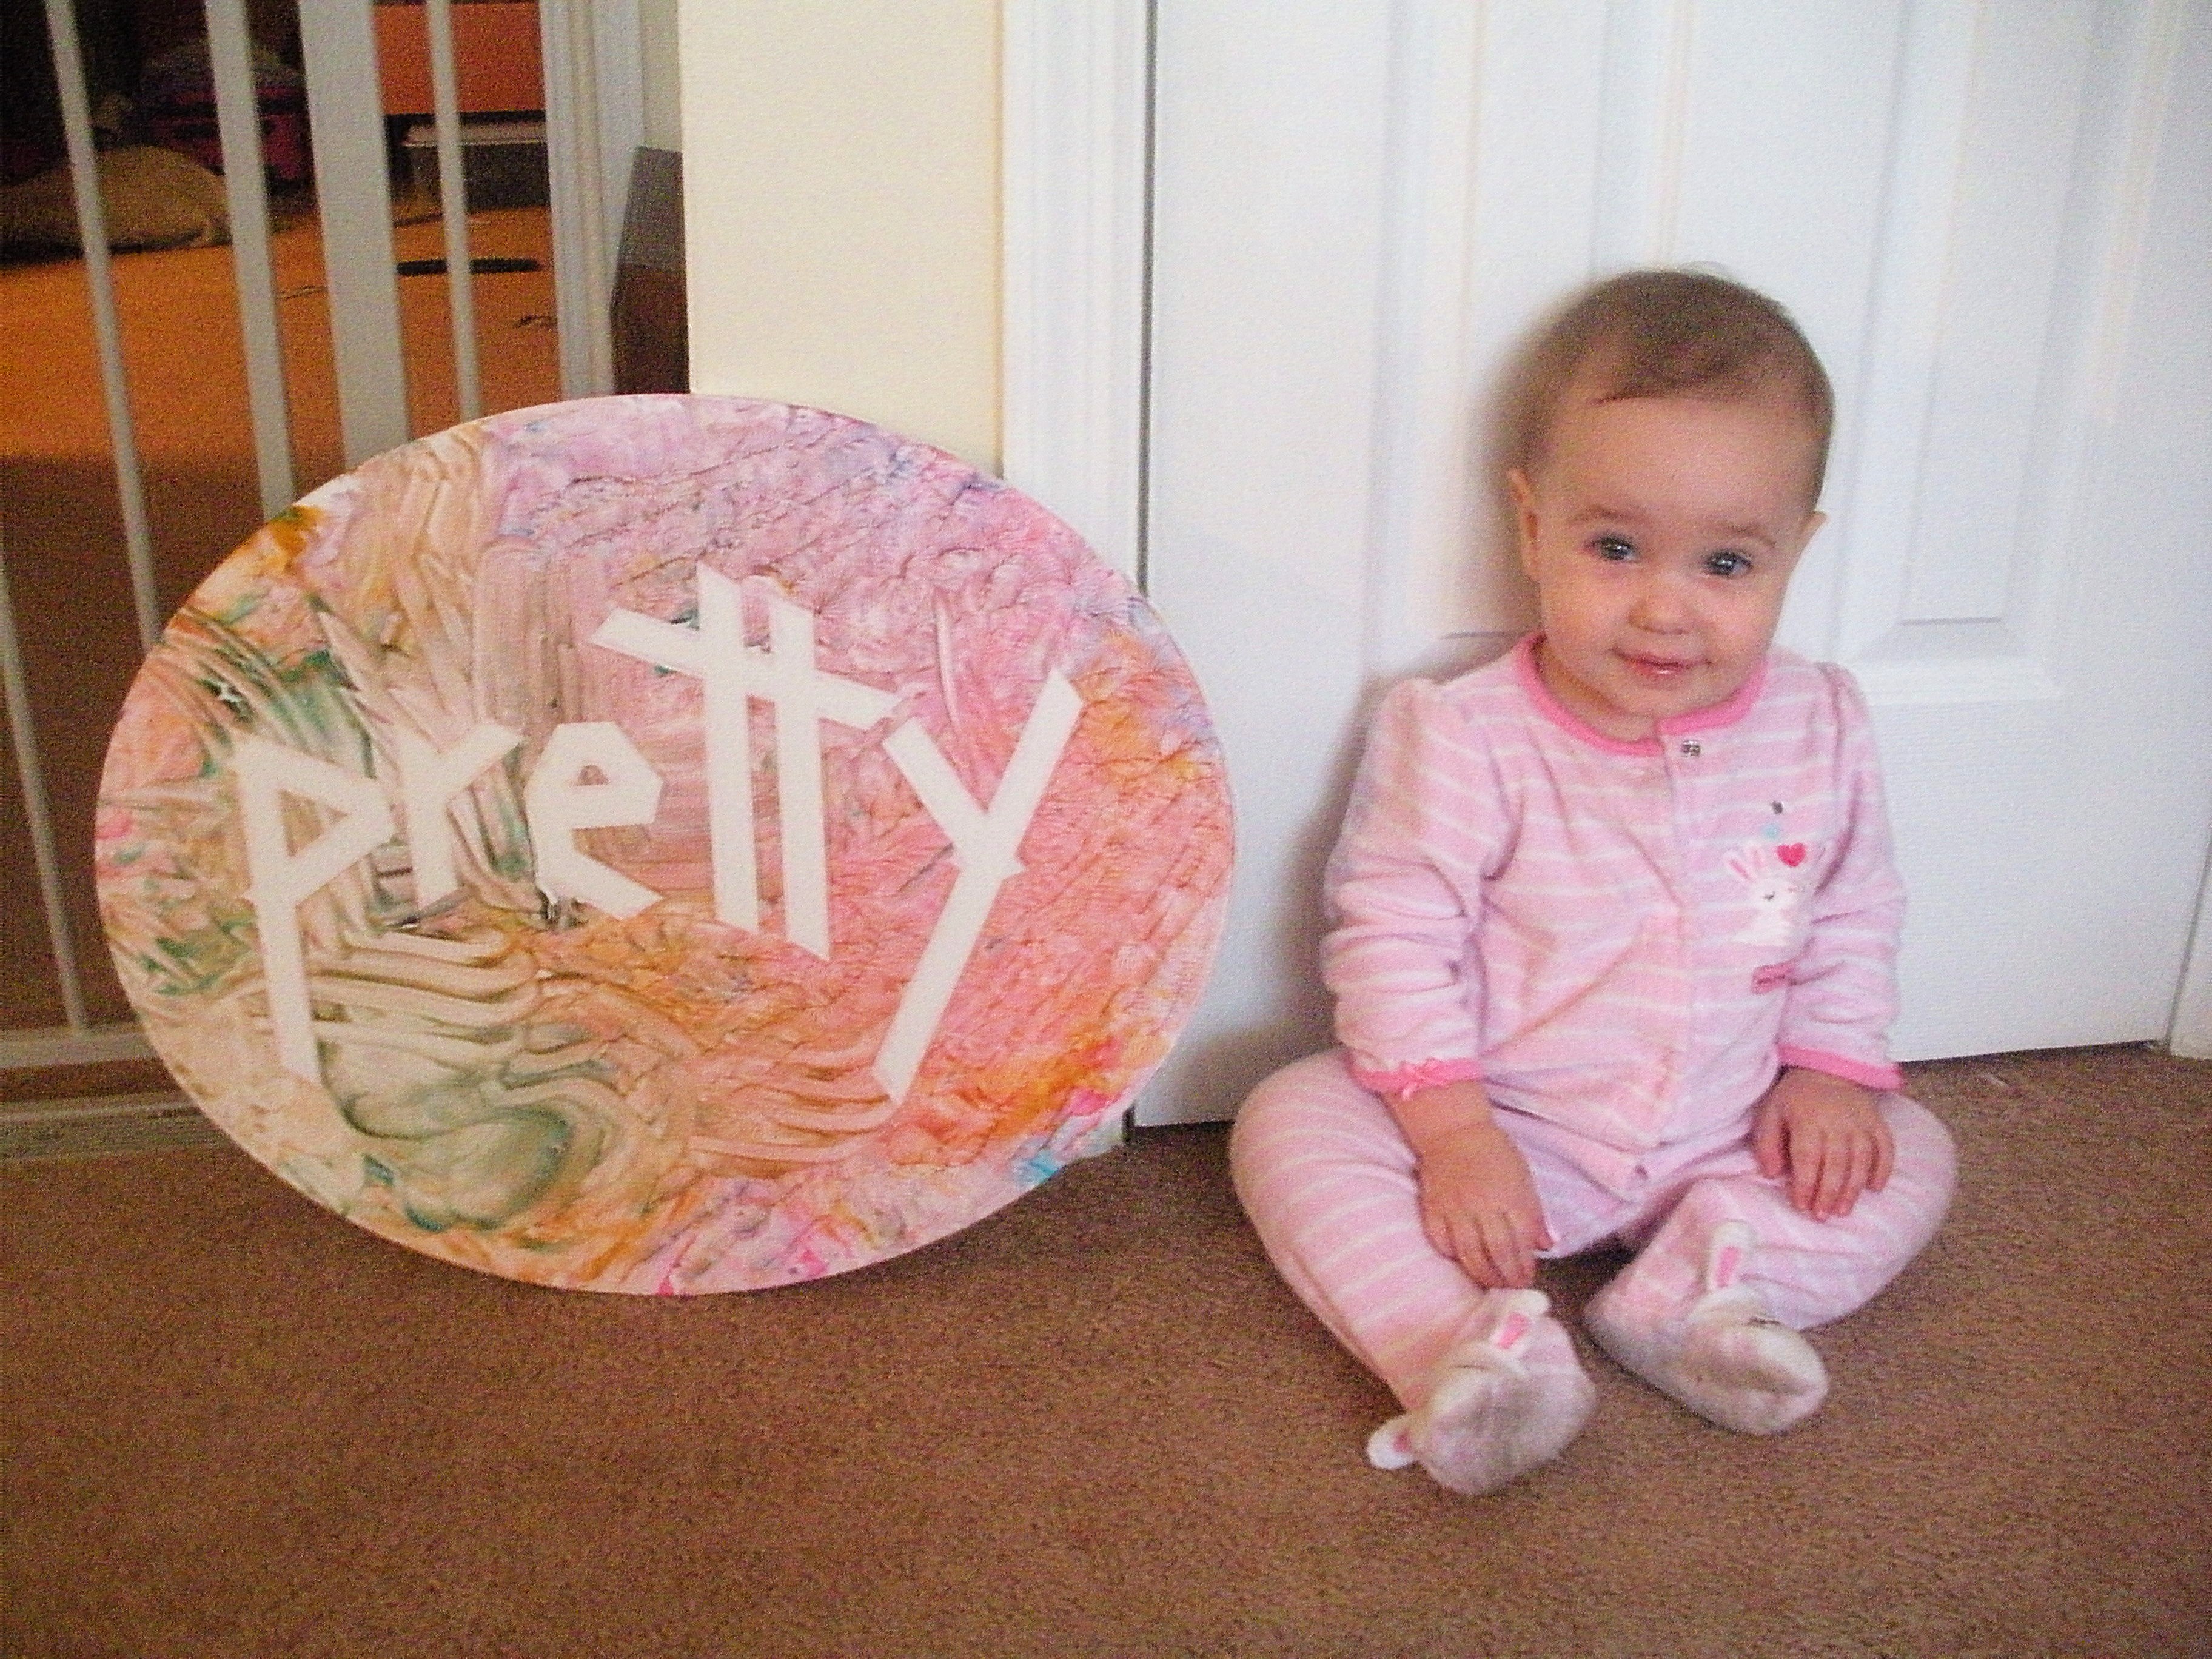
The pin I followed suggests using masking tape to spell a word on the canvas and let your baby finger paint on it. When the paint dries, remove the tape to see the word printed in white.
I chose my daughter’s favorite word: “pretty.” She doesn’t use it to describe things of particular beauty, but rather to indicate anything and everything she likes. Animal crackers, her piggy bank, my shoes and our pet fish are all “pretty.” What a nice way to look at the world.

After setting up a space on the floor shrouded by towels and laying the prepared canvas, I stripped my daughter down to her diaper and plopped her down. Instead of seeing the next Michelangelo blossom before my eyes, I watched as my princess smothered paint on the canvas, the towels and her own legs before crawling into her creation and attempting to stand on it, giggling the whole time.

My word of caution is to use colors that when blended will not resemble a color also seen in your child’s diaper. Purple and orange do not mix well. If it has a future hung on the wall, think carefully about which colors to give your petite Picasso.
The event concluded with a sprint to the bathtub, and both our hands are stained bubblegum pink. Still, I’m confident we’ll be using our finger paints again in the future. We saved money on a completely non-toxic art supply and now have a “pretty” masterpiece.
Final Points:
- Cost- B. Supplies for the finger paints were inexpensive and can be used again, but canvases can be pricey.
- Difficulty- B. Every part of this project is simple as long as you’re patient, but cleanup could be a pain if you don’t watch your child closely.
- Entertainment- A. The whole process was interesting, fun and full of laughs. Older children could be more involved in choosing paint colors too.
- Results- A. We have leftover finger paint and a lovely new piece of art.